OS X工具集
1.class-dump
1.简介
class-dump顾名思义,是用来dump目标对象class信息的工具。它根据oc的runtime特性,将存储在Mach-O文件中的头文件信息提取出来,生成对应的.h文件。 可以在官网下载最新版本,下载地址:
将dmg中的class-dump可执行文件放在/usr/bin目录下,并赋予其执行权限:
sudo chmod 777 /usr/bin/class-dump
class-dump的对象是Mach-O格式的二进制文件,如Framework的库文件和App的可执行文件。下面以一个App为例,来看看class-dump的完整流程。
2.class-dump可执行文件
终端输入:class-dump -H xxx -o outpath 如移动办公软件,导出头文件到当前目录的Headers下:
class-dump-z -H Payload/dahuamobile.app/dahuamobile -o ./Headers

透过这些头文件,移动办公的程序架构就能初见端倪了,经验丰富的开发人员可以从中了解非常多的信息,这些信息是iOS逆向工程的基础。不过现在的App工程越来越大,经常引用第三方代码,class-dump导出的头文件可能会成百上千。移动办公的头文件,就达800多。可以通过搜索、借用各种工具,逐步减小目标范围,最后定位到目标函数。
Tips:
- 目前Swift、C函数无法通过class-dump导出
- AppStore上下载的App都是经过加密的,可执行文件被加上了一层壳,应付不了这样的文件。需要通过砸壳软件进行破壳,才能取出里面的肉
2.Theos
2.1 简介
Theos是一个越狱的开发工具包,由iOS越狱界知名人士Dustin Howett(@DHowett)开发并分享到GitHub上。THoes与其他越狱开发工具相比,最大的特点是简单:下载安装简单、logos语法简单、编译发布简单,可以让使用者把精力都放在开发工作上去。
2.2 安装
2.2.1 安装Xcode与Command Line Tools
iOS开发必备工具,多个Xcode,需要通过xcode-select指定一个活动
sudo xcode-select -s /Applications/Xcode3.app/Content/Developer
2.2.2 安装Theos
参考wiki:
需要注意设置几个变量
export THEOS=/opt/theos
export PATH=$THEOS/bin:$PATH
export THEOS_DEVICE_IP=example.local
2.2.3 工具包
后面需要的几种小工具包,已放到网盘中,可以直接取来用
2.2.4 配置ldid
用来签名iOS可执行文件的工具,用以在越狱iOS中取代Xcode自带的codesign。从http://joedj.net/ldid 下载ldid,放在/opt/theos/bin下,也可以使用工具包里面的,并赋予可执行权限
2.2.5 配置CydiaSubstrate
libsubstrate.dylib拷贝到 /opt/theos/lib下
2.2.6 配置dpkg-deb
deb是越狱开发安装包的标准格式,dpkg-deb是一个用于操作deb文件的工具。
2.3 Theos用法简介
2.3.1 创建工程
cd到工程目录下,启动NIC(New Instance Creator),之前设定过的环境变量THEOS为/opt/theos/,如下:
 jiangbindeMac-mini:iOS_ReverseEngineering jiangbin$ $THEOS/bin/nic.pl
NIC 2.0 - New Instance Creator
>------------------------------
  [1.] iphone/application
  [2.] iphone/library
  [3.] iphone/preference_bundle
  [4.] iphone/tool
  [5.] iphone/tweak
Choose a Template (required):
默认的有5种模版,初级阶段主要使用的类型是1和5。更多的模版,可以通过DHowett的GitHub上下载。
这里选择5,创建tweak工程。注意里面的
MobileSubstrate Bundle filter[com.apple.springboard]
tweak作用的bundle identifier,默认为SpringBoard,也就是tweak作用的程序。
Choose a Template (required): 5
Project Name (required): HelloWorld
Package Name [com.yourcompany.helloworld]:
Author/Maintainer Name [jiangbin]:
[iphone/tweak] MobileSubstrate Bundle filter [com.apple.springboard]: com.dahuatech.app.dahuamobile
[iphone/tweak] List of applications to terminate upon installation (space-separated, '-' for none) [SpringBoard]:
Instantiating iphone/tweak in helloworld/...
Done.
2.3.2 定制工程文件
用Theos创建tweak工程非常方便,但简洁的工程框架下目前还是些粗糙的内容,需要进一步加工相关的文件。先来看看刚刚生成的工程目录,如下:
jiangbindeMac-mini:helloworld jiangbin$ ls -l
total 40
-rw-r--r--  1 jiangbin  staff    65  6 20 09:45 HelloWorld.plist
-rw-r--r--  1 jiangbin  staff   180  6 20 09:45 Makefile
-rw-r--r--  1 jiangbin  staff  1045  6 20 09:45 Tweak.xm
-rw-r--r--  1 jiangbin  staff   221  6 20 09:45 control
lrwxr-xr-x  1 jiangbin  staff    50  6 20 09:45 theos -> /Users/jiangbin/Files/iOS_ReverseEngineering/theos
除去一个指向Theos目录的符号链接外,只有4个文件,从工程复杂度来说完全不会吓跑初学者,反而会让我们跃跃欲试,Theos的产品体验做得很好。
- Makefile
Makefile文件指定工程用到的文件、框架、库等信息,将整个过程自动化。iOSREProject的Makefile内容如下:
  include theos/makefiles/common.mk

  TWEAK_NAME = HelloWorld
  HelloWorld_FILES = Tweak.xm

  include $(THEOS_MAKE_PATH)/tweak.mk

  after-install::
      install.exec "killall -9 SpringBoard"
其他字段:
1)指定处理器架构
ARCHS = armv7 arm64
上面的语句在表示不同的处理器架构时,其间以空格分隔。值得注意的是,采用arm64架构的App不兼容armv7/armv7s架构,必须适配arm64架构的dylib。在绝大多数情况下,这里固定填写“arm7 arm64”就行了。
2)指定SDK版本
TARGET = iphone:Base SDK:Deployment Target
比如:
TARGET = iphone:8.1:8.0
上面的语句即指定采用8.1版本的SDK,且发布对象为iOS 8.0及以上版本。也可以把“Base SDK”设置为“latest”,指定以Xcode附带的最新版本SDK编译,如:
TARGET = iphone:latest:8.0
3)导入framework iOSREProject_FRAMEWORKS = framework name
例如:
iOSREProject_FRAMEWORKS = UIKit CoreTelephony CoreAudio
上面的语句所展示的功能没什么多说的,但既然是tweak开发,很多朋友关注的应该是如何导入private framework吧?很简单,用下面的语句即可:
iOSREProject_PRIVATE_FRAMEWORKS = private framework name
4)指定目标机器,如 THEOS_DEVICE_IP = 172.20.10.3
修改后的Makefile文件如下:
include theos/makefiles/common.mk

THEOS_DEVICE_IP = 172.20.10.3
ARCHS = armv7 arm64
TARGET = iphone:latest:7.0

TWEAK_NAME = HelloWorld
HelloWorld_FILES = Tweak.xm
iOSREHookerTweak_FRAMEWORKS = UIKit

include $(THEOS_MAKE_PATH)/tweak.mk

after-install::
    install.exec "killall -9 SpringBoard"
- Tweak.xm
用Theos创建tweak工程,默认生成的源文件是Tweak.xm。“xm”中的“x”代表这个文件支持Logos语法,如果后缀名是单独一个“x”,说明源文件支持Logos和C语法;如果后缀名是“xm”,说明源文件支持Logos和C/C++语法,与“m”和“mm”的区别类似。Tweak.xm的内容如下:
/* How to Hook with Logos
Hooks are written with syntax similar to that of an Objective-C @implementation.
You don't need to #include <substrate.h>, it will be done automatically, as will
the generation of a class list and an automatic constructor.

%hook ClassName

// Hooking a class method
+ (id)sharedInstance {
return %orig;
}

// Hooking an instance method with an argument.
- (void)messageName:(int)argument {
      %log; // Write a message about this call, including its class, name and arguments, to the system log.

      %orig; // Call through to the original function with its original arguments.
      %orig(nil); // Call through to the original function with a custom argument.
      // If you use %orig(), you MUST supply all arguments (except for self and _cmd, the automatically generated ones.)
}

// Hooking an instance method with no arguments.
- (id)noArguments {
      %log;
      id awesome = %orig;
      [awesome doSomethingElse];

      return awesome;
}

// Always make sure you clean up after yourself; Not doing so could have grave consequences!
%end
*/
</substrate.h>
最基本的Logos语法,包含%hook、%log、%orig这3个预处理指令
1) %hook
指定要hook(勾住)的class,必须以%end结尾
2) %log
该指令在%hook内部使用,将函数的类名、参数等信息写入syslog, 可以以%log([(
) , ...])的格式追加其他打印信息
3) orig
该指令在%hook内部使用,执行被钩住(hook)的函数的原始代码:
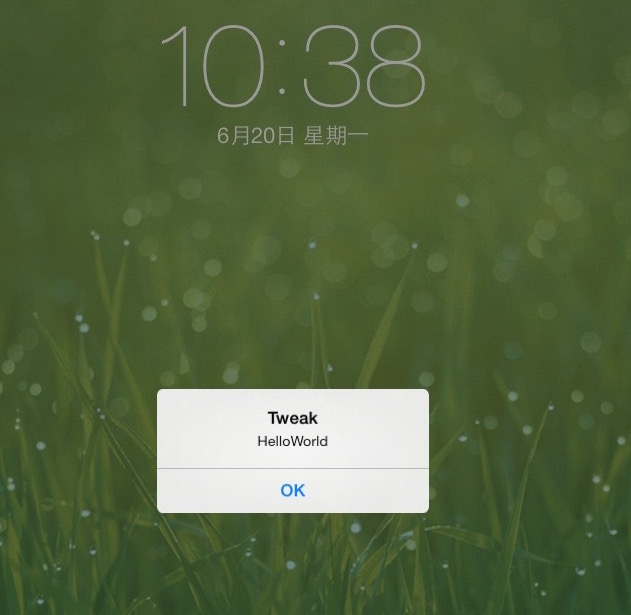
比如在按下Home键的时候,弹出一个Hello的提示框
%hook SpringBoard
- (void)_menuButtonDown:(id)down
{
     %log((NSString *)@"iOSRE", (NSString *)@"Debug");
     %orig; // call the original _menuButtonDown:

     UIAlertView *testAlert = [[UIAlertView alloc] initWithTitle:@"Tweak" message:@"HelloWorld" delegate:self
         cancelButtonTitle:@"OK" otherButtonTitles:nil];

    [testAlert show];
    [testAlert release]; //for non-arc
}
%end
这段代码的意思是钩住(hook)SpringBoard类里的_menuButtonDown:函数,先将一句话写入syslog,再执行函数的原始操作。最后弹出一个提示框。
除了%hook、%log、%orig以外,Logos常用的预处理指令还有%group、%init、%ctor、 %new、%c、%subclass、%config等
- %group
该指令用于将%hook分组,便于代码管理及按条件初始化分组(含义稍后有详细解释),必须以%end结尾;一个%group可以包含多个%hook,所有不属于某个自定义group的%hook会被隐式归类到%group _ungrouped中
4) %init
该指令用于初始化某个%group,必须在%hook或%ctor内调用;如果带参数,则初始化指定的group,如果不带参数,则初始化_ungrouped
5) %ctor
tweak的constructor,完成初始化工作;如果不显式定义,Theos会自动生成一个%ctor,并在其中调用%init(_ungrouped)
6) %new
%hook内部使用,给一个现有class添加新函数,功能与class_addMethod相同
- 2.3.3 control
control文件记录了deb包管理系统所需的基本信息,会被打包进deb包里。control文件中的很多信息直接体现在Cydia中,可以在Cydai的已安装插件中进行查看
2.4 编译+打包+安装
前面在完成了Theos的安装后,使用NIC创建了第一个tweak工程,还逐一解读了工程的组成文件,那么现在就剩下最后一步——编译了。完成这一步,一个tweak就算正式完成——我们可以把tweak安装到设备上。
2.4.1 编译
工程目录下直接使用make命令,最后生成一个obj文件夹,里面包含一个.o文件和一个dylib文件
  jiangbindeMac-mini:helloworld jiangbin$ ls -l obj/
total 32
  -rwxr-xr-x  1 jiangbin  staff  8864  6 20 11:00 HelloWorld.dylib
  -rw-r--r--  1 jiangbin  staff  2524  6 20 11:00 Tweak.xm.15116838.o
2.4.2 打包
make package 命令,完成后生成一个.deb包
 jiangbindeMac-mini:helloworld jiangbin$ make package
/Users/jiangbin/Files/iOS_ReverseEngineering/Theos/helloworld/theos/makefiles/targets/Darwin/iphone.mk:41: Deploying to iOS 3.0 while building for 6.0 will generate armv7-only binaries.
Making all for tweak HelloWorld...
make[2]: Nothing to be done for `internal-library-compile'.
Making stage for tweak HelloWorld...
dm.pl: building package `com.dahuatech.helloword:iphoneos-arm' in `./com.dahuatech.helloword_0.0.1-7_iphoneos-arm.deb'
jiangbindeMac-mini:helloworld jiangbin$ ls -l
total 48
-rw-r--r--  1 jiangbin  staff    57  6 20 10:25 HelloWorld.plist
-rw-r--r--  1 jiangbin  staff   290  6 20 10:28 Makefile
-rw-r--r--  1 jiangbin  staff   411  6 20 10:38 Tweak.xm
drwxr-xr-x  4 jiangbin  staff   136  6 20 11:02 _
-rw-r--r--  1 jiangbin  staff  2268  6 20 11:02 com.dahuatech.helloword_0.0.1-7_iphoneos-arm.deb
-rw-r--r--  1 jiangbin  staff   218  6 20 10:25 control
drwxr-xr-x  5 jiangbin  staff   170  6 20 11:00 obj
lrwxr-xr-x  1 jiangbin  staff    10  6 20 10:25 theos -> /opt/theos
2.4.3 安装
1、 图形界面安装
通过iFunBox、iFile等工具直接安装deb,然重启iOS使之生效。
2、命令行安装
make install命令。这个方法要用到简单的ssh命令。之前在Makefile文件中添加了目标机器的地址,安装过程中会要求输入两次root的密码。
THEOS_DEVICE_IP = 192.168.0.110
Theos在整个安装过程中要求我们输入两次root密码。虽然多次输入密码给人很安全的感觉,但实在是太麻烦了。好在通过设置iOS的authorized_keys可以省略SSH输密码的步骤,让“make package install”真正地从“一只多脚虫”变成“一条飞天龙”,具体步骤如下:
1)删除“/Users/snakeninny/.ssh/known_hosts”中iOSIP对应的条目。
假设iOS的IP地址是iOSIP。编辑“/Users/snakeninny/.ssh/known_hosts”,找到iOSIP所在的那一行,如下:
iOSIP ssh-rsa hXFscxBCVXgqXhwm4PUoUVBFWRrNeG6gVI3Ewm4dqwusoRcyCxZtm5bRiv4bXfkPjsRkWVVfrW3uT52Hhx4RqIuCOxtWE7tZqc1vVap4HIzUu3mwBuxog7WiFbsbbaJY4AagNZmX83Wmvf8li5aYMsuKeNagdJHzJNtjM3vtuskK4jKzBkNuj0M89TrV4iEmKtI4VEoEmHMYzWwMzExXbyX5NyEg5CRFmA46XeYCbcaY0L90GExXsWMMLA27tA1Vt1ndHrKNxZttgAw31J90UDnOGlMbWW4M7FEqRWQsWXxfGPk0W7AlA54vaDXllI5CD5nLAu4VkRjPIUBrdH5O1fqQ3qGkPayhsym3g0VZeYgU4JAMeFc3
完整删掉这一行。
2)生成authorized_keys。
在Terminal中执行如下命令:
snakeninnysiMac:~ snakeninny$ ssh-keygen -t rsa
Generating public/private rsa key pair.
Enter file in which to save the key (/Users/snakeninny/.ssh/id_rsa):
Enter passphrase (empty for no passphrase):
Enter same passphrase again:
Your identification has been saved in /Users/snakeninny/.ssh/id_rsa.
Your public key has been saved in /Users/snakeninny/.ssh/id_rsa.pub.
……
snakeninnysiMac:~ snakeninny$ cp /Users/snakeninny/.ssh/id_rsa.pub ~/authorized_keys
就会在用户目录下生成authorized_keys。
3)配置iOS。
在Terminal中执行如下命令:
FunMaker-5:~ root# ssh-keygen
Generating public/private rsa key pair.
Enter file in which to save the key (/var/root/.ssh/id_rsa):
Enter passphrase (empty for no passphrase):
Enter same passphrase again:
Your identification has been saved in /var/root/.ssh/id_rsa.
Your public key has been saved in /var/root/.ssh/id_rsa.pub.
……
FunMaker-5:~ root# logout
Connection to iOSIP closed.
snakeninnysiMac:iosreproject snakeninny$ scp ~/authorized_keys root@iOSIP:/var/root/.ssh
The authenticity of host 'iOSIP (iOSIP)' can't be established.
RSA key fingerprint is 75:98:9a:05:a3:27:2d:23:08:d3:ee:f4:d1:28:ba:1a.
Are you sure you want to continue connecting (yes/no)? yes
Warning: Permanently added 'iOSIP' (RSA) to the list of known hosts.
root@iOSIP's password:
authorized_keys                                                   100%  408
0.4KB/s   00:00
3.Reveal
略
4.IDA
IDA(The Interactive Disassembler)的鼎鼎大名。而对于绝大多数接触过逆向工程的人来说,IDA三个字则是如雷贯耳,它乃逆向工程中最负盛名的神器之)。如果说class-dump能够帮我们罗列出要分析的点,那IDA就能进一步帮我们把这些点铺成面